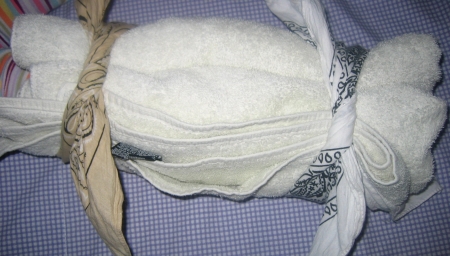
How To Create An Effective Splint For A Child In Seconds
This post will show you examples of some homemade splints that you could create quickly.
Since a child’s arm is significantly smaller than an adult’s arm, some of the quick and improvised homemade splints that you’ve learned about in a First Aid course might not work so well for children.
An improvised home made splint that I have found that works best for a child is a simple bath towel.

In a first aid course, they teach to use either a roller bandage or a triangular bandage to tie the splint to the arm. The problem is that most people simply don’t have either of these bandages lying around the house. The best things to use are a couple of bandannas. The more colorful the better. Kids aren’t usually frightened by bath towels and bandannas as they are with regular splints and bandages.
How to splint
1. Place the towel under your child’s arm so that the towel covers the distance from her fingertips to her elbow (or slightly past the elbow).

2. Take a bandanna and position it either above or below the injured wrist and tie it (double knot) so that the arm is completely and tightly wrapped in the towel. Take the second bandanna, place it as well either below or above the injured spot, and tie it tightly.

3. Make sure that you could visibly see and feel the fingertips.
Splinting for adults
For adults, a pillow or even a newspaper folded in half would work fairly well. Follow the same procedure as above for splinting for adults.


No comments:
Post a Comment